
|
|
|
|
|
|
Construction of an Orc from Moria
Please note, the project at this level is for intermediate and advanced folks. However, don't let that stop you from tacking pieces of this for yourself. List of material includes:See the actual write-up for places to get some of the harder to find materials.
Please note, a lot of the items mentioned here are hazardous if not used properly. Please read all instructions attached to all materials and follow these carefully.
Step 1: Realize that you are crazy.Now you may proceed.When I initially read the books, I wouldn’t have imagined making an Orc costume. The Orcs, as I remember, were often described as swarthy and smelly. However, when I saw The Fellowship of the Ring film, I was delighted by the Orcs from the Mines of Moria. I looked at a lot of pictures of the films Orcs, on the internet, on the official movie website, in books like The Lord of the Rings-The Making of the Movie Trilogy by Brian Sibley. I based my costume on page 64 of “ The Lord of the Rings”-The Fellowship of the Ring Visual Companion by Jude Fisher. There is a slender Orc with no helmet, holding a spear. We also studied the special DVD material, every bit of it, especially as related to Orcs, armor, chain mail, drawings, etc. I modified my costume several ways: Many Orcs are pictured wearing a red fabric garment under the armor. I live in California, not New Zealand, so I decided my costume was hot enough without it. The red garment also made me look smaller. The Orc on page 64 of the Visual Companion, also has sleeves of chain mail and no shoulder pieces. Since we already had set of good vac-form shoulders, I decided not to knock myself out making unnecessary PVC-pipe chain mail sleeves. We found a lot of great detail in the figure of the Orc Swordsman from Sideshow Collectibles. The figure wears a helmet. It was the most important thing used to get the armor right. Since we went through so much trouble for the face to look good, we decided not to have me wear a helmet and possibly damage the make-up face or ears. We have a set of vac-form helmets parts but we did not have time to finish the one for Nina for the San Diego comic convention costume contest anyway that was the first goal for the costume at the time. Step 2: Obtain or Make Your Armor
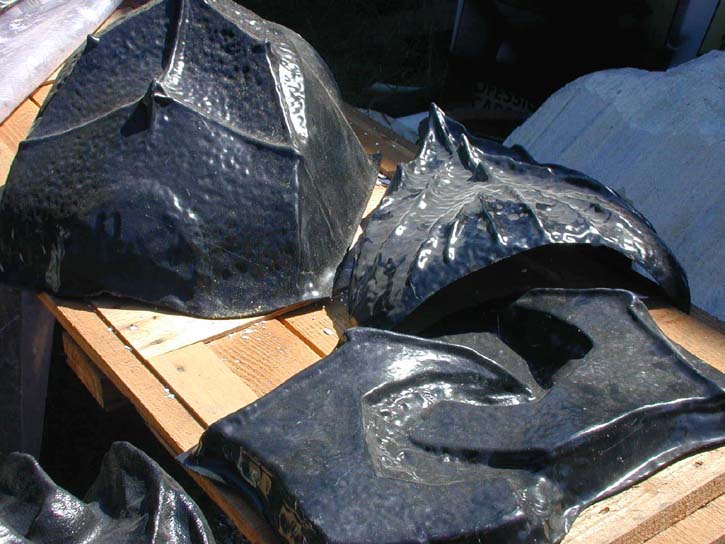
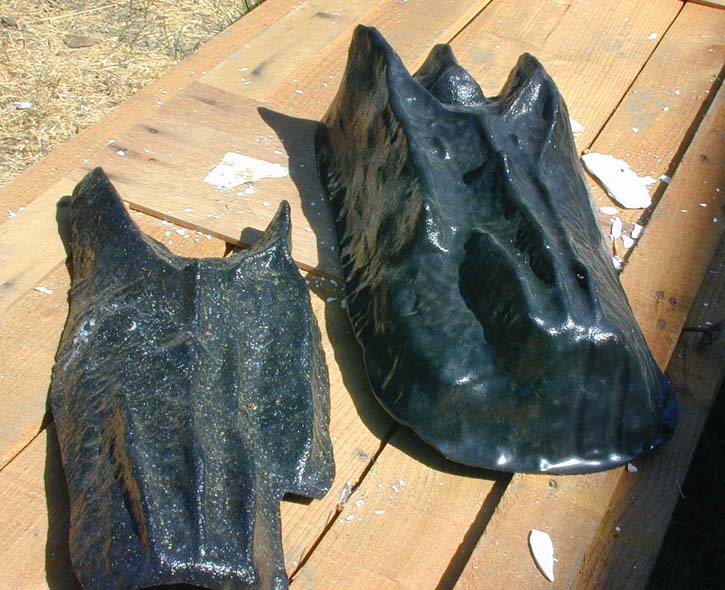
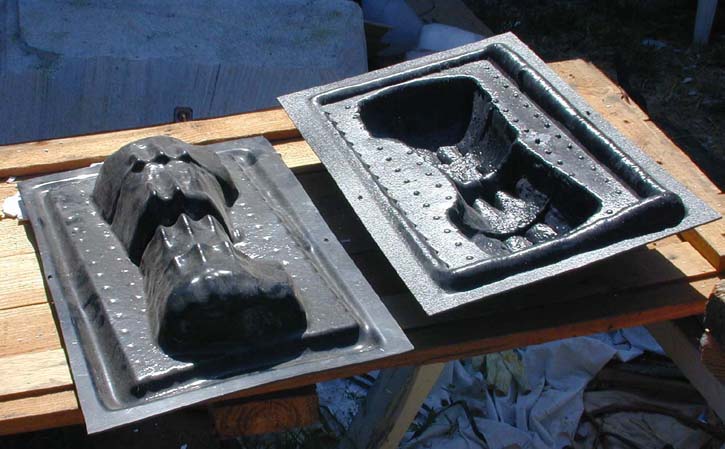
The armor parts we used were sculpted by some fellas from Hi-Impact, Matt Clayson and Richard Jacobsen. It was sculpted in water-based clay over some pre- existing ultra-cal # 30 positive vacuum-form tools, i.e. molds of a Star Wars Storm Trooper’s armor. After the sculpt stage was complete the water clay was left to dry until it became leather-hard. Black styrene Plastic was vacuum-formed over that clay directly. The clay sculpt became a temporary vacuum-form tool. After the clay completely dried out (from heat of pulling the parts) it became cracked, brittle, and unusable. So a few to a dozen sets of parts can be made using this method, but that is about all before the tooling is destroyed. The guys in Hi-Impact created this armor to wear to the opening of Fellowship of the Ring at the Grand Lake Theater in Oakland Ca. Ed went with them and did some special make-up prosthetics for the group on that day. After that he asked to join the group of Moria Orcs and obtained two sets of armor: for himself and Nina. How is This Orc Armor made:
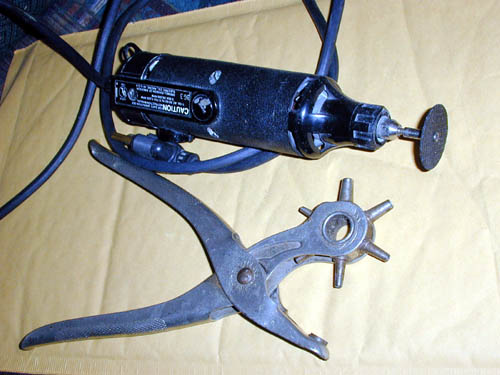
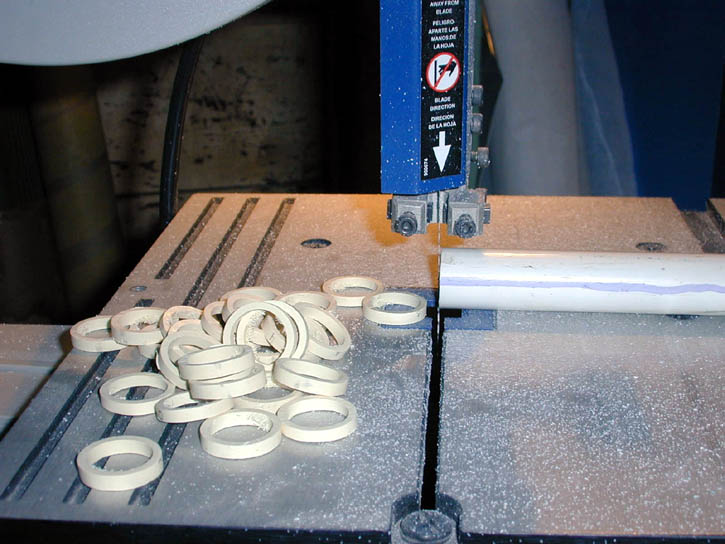
The plastic armor is vacuum-formed on wooden rectangular frames. For this article we will not discuss the complex process of vacuum-forming; we’ll leave that for another time. Excess plastic needs to be cut away from each piece of the armor. After the parts are marked for cutting Ed used a band saw and a dremel with a cutting wheel for this. Nina sanded and filed the edges of the pieces and fit them to her body to show Ed how to trim them to fit better. Using a power belt sander, files and sandpaper they made sure the edges wouldn’t be sharp or uncomfortable. Using a heat gun, and heavy gloves we bent and shaped the pieces forming them to fit Nina’s body better.
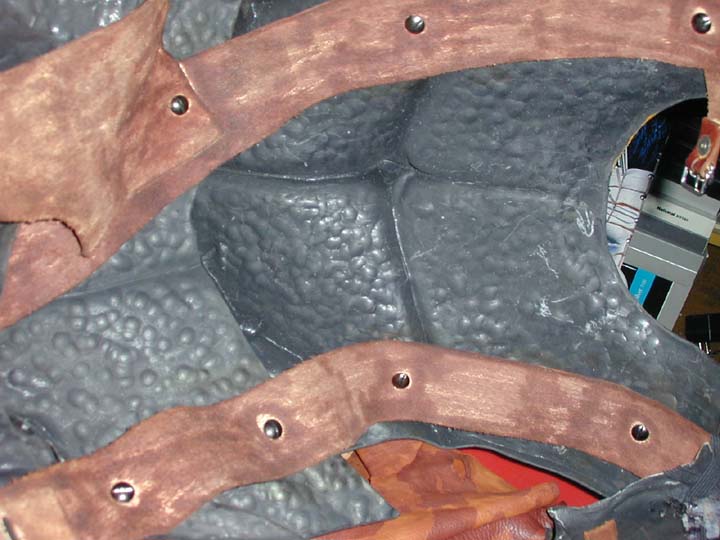
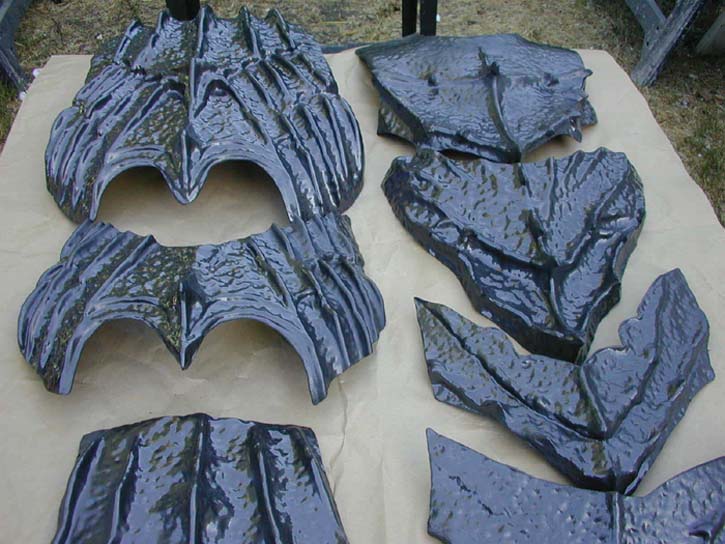
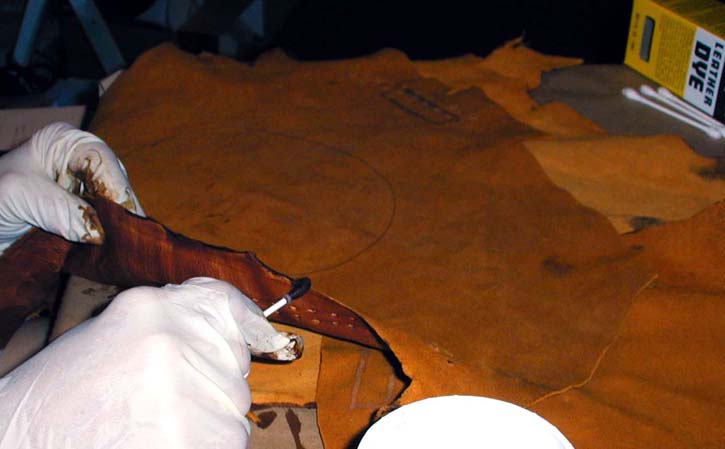
We drilled holes in the armor pieces and attached them to leather straps using black ¼ inch rounded head rivet type screw back posts. (we got them at the Leather Supply store) We used the ones that come 10 to a pack – but beware: they loosen up and need to be checked each time you put on the costume! The screws could be made permanent using a drop of super glue or a glob of Magic sculpt resin putty but we wanted to be able to disassemble it. (So that we could fit the costume into a suitcase for travel to conventions and other events) The leather straps were all dyed dark brown to match the garment. Since the armor pieces are formed out of black plastic, details can be added using Wesco’s Magic Sculpt resin putty (3235 Monier Circle, Suite 1, Rancho Cordova, CA 95742). This can be mixed together with your hands. It becomes clay like and can be applied directly to the plastic to create points and spikes etc. It can be smoothed with water to get rid of fingerprints and tool marks. Refer to the instructions on the packaging. Ed highly recommends this product; he finds many uses for it, too many to list here. We washed the armor thoroughly using dish soap and water and a brush to get all the grease and dirt off of the plastic. (This allows the primer to stick better) The first step in painting the armor is to apply a flat black spray can primer, inside and out: all surfaces. After the primer, Ed coated everything with a heavy layer of Black Rustoleum-brand “Hammered metal” type paint, twice to make two thick, heavy coats. The hammered metal layer must be very thorough or the “fake metal effect will not work”. This layer is done on the outside, visible surfaces only. Ed then gave the whole thing a coat of black leather dye, (Kiwi brand with the sponge applicator on top of the bottle). He made sure to soak the leather dye into all the nooks and crannies. Once the leather dye was dry, we both ‘scrubbed’ the armor lightly with light-gauge steel wool. We concentrated on the high points and left black leather dye in the crevices and low spots. (This is what creates the faux metal patina) Next Ed misted on red-brown primer for the rusting metal effect coating some areas more than others. He did this in small sections, working quickly removing some of it with steel wool as you go. If you try this, don’t wait too long when you do this step or too much paint will stick to the plastic, no more than a minute or two then rub it off. Ed also added some other shades of rust colors, some oranges, browns, etc. including use of some acrylic paints.
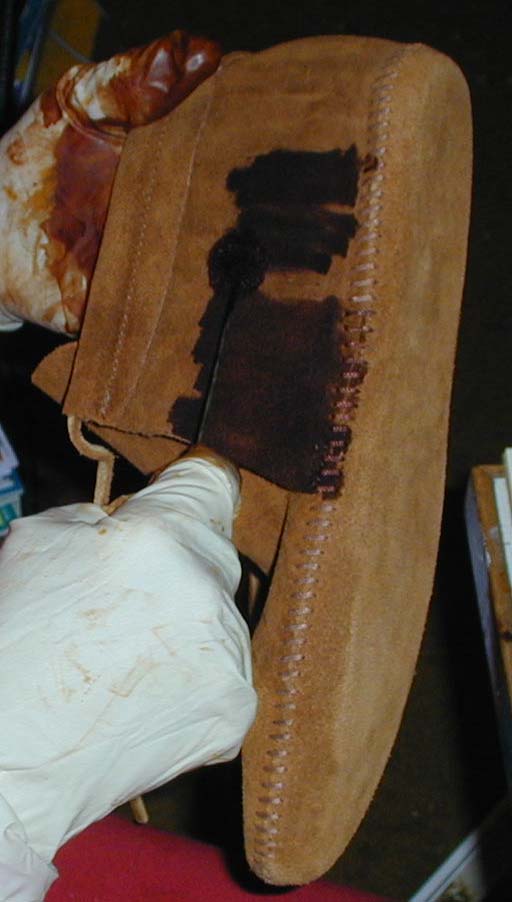
We should also mention the shoulders: Ed used Magic Sculpt brand resin putty to add a layer to the top of the shoulder. He gave this layer a crisp definite edge and added spikes to resemble the small figure we had of the Orc Swordsman. Step 3: Create Orc’s Leather Garment
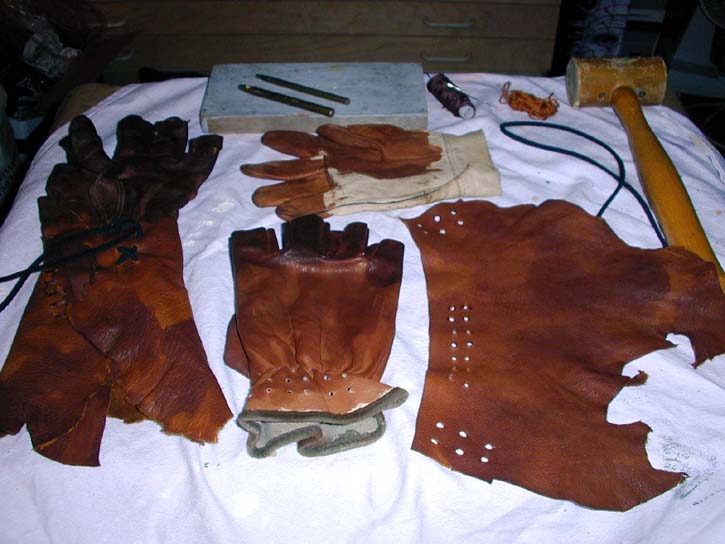
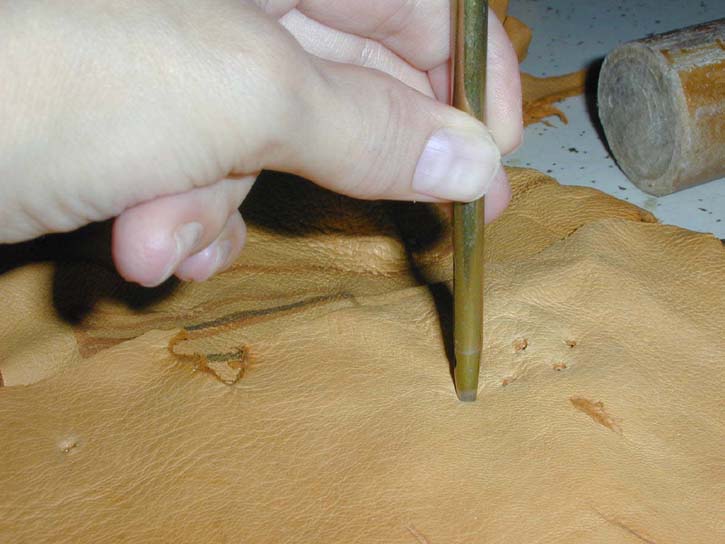
We used a sewing dress form that has dials all around it so you can make it different sizes. We dialed it to my size, more or less. Years ago my Dad had found someone who tanned deer hide. My Dad is an avid deer hunter and eventually had 4 plus hides. They were suede on one side, leather-finish on the other and came in various butterscotch hues. (I hated to dye them for this project!). I found a man named David S. who makes traditional American Indian garments. He made vests for my Dad and brother Rick and gave me all the scraps back, every single one! These scraps were the entire resource for my leather Orc garment. First, I fit a collar shape around the sewing form. I approached it by instinct, as if an Orc might. I knew that I would wear a chain mail collar and wanted to protect my neck from being irritated by it. Next I fashioned a skirt that was high on the sides and low in the front and back. I lashed parts together by punching rows of holes in the leather and sewing thick brown waxed thread in crude strokes. An Orc would make a functional seam, not a pretty one. Reluctantly I dyed each piece dark brown before I lashed it together. I let the dye be spattery and uneven so that it would look water damaged. (An Orc on the hunt wouldn’t sleep in a soft bed but rather right on the wet ground if at all.) The outer layer was smooth and leathery, while the inside was soft and suede. To add the strap and buckle to the skirt, we used punched holes with a leather-working tool and then lashed it with the same brown thread. I used a single hole punch and mallet to make the larger holes in the top of the jacket wide enough for leather laces. This gave a bare minimum of protection from the armor, but the sides were too open. Next, I created a back panel, then a right and left side that curved around the torso. I didn’t need to distress the edges; they already had an authentic ragged-fresh-off-the-tanning-frame look. Now the leather would protect me and my bodysuit from the chain mail and armor. Step 4: BodysuitWe purchased a neutral-colored body suit at a local dance supply store. It has a scooped neckline and reaches to wrists and ankles. I sewed a strap of black elastic band, about 3/8 inch wide, onto the ends of each wrist. This kept it from riding up the arm, creating wrinkles. We saw on the DVD that the Moria Orcs bodysuits had this detail as well. Ed mixed up airbrush colors, worked on most of it while I wore it, standing on an upturned 5 gallon bucket, spinning around slowly while he painted. Ed used standard acrylic airbrush paint which states on the bottle that it can be used on fabric, Shivair brand. He began with an avocado green/olive drab color, misted on. He built up the color in certain areas, mottling it, creating musculature, biceps, quadriceps. He concentrated on any areas that would be visible without the armor covering it. The entire body suit was misted to change the color from tan to a sort of greenish tone. He also used some transparent sepia toned paint to add warts and spots and give it more contrast and definition. It’s a subtle application that improved the overall look of the body. Step 5: Making PVC Chain Mail
Check out our page on How to Make PVC Chain Mail Step 6: Legs and shoes
|
 |
 |
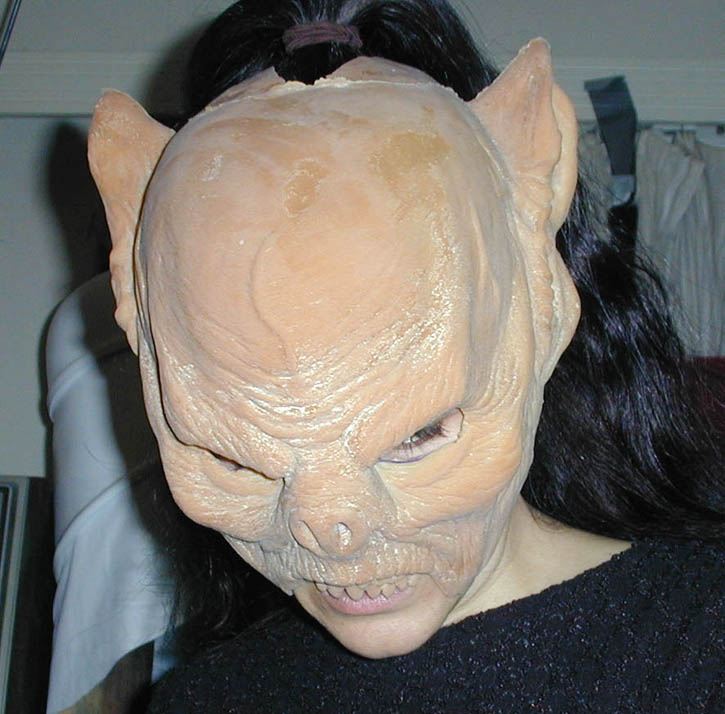
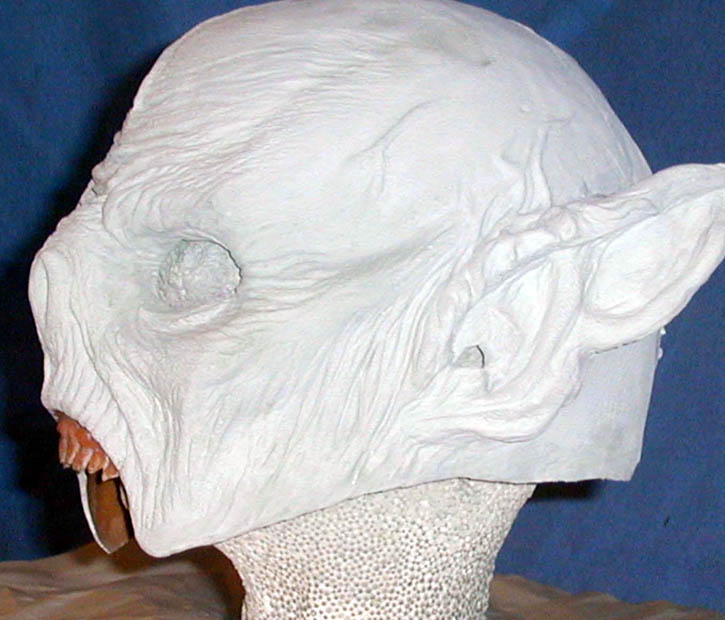
| Unpainted latex piece | Trying out the wrinkle effect |
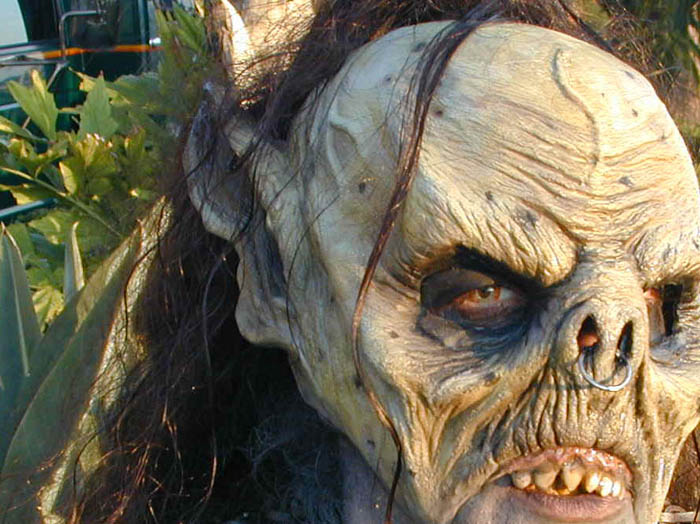
Ed’s friend Rick Gonzales helped him with the latex face piece. It was made using a lifecast of a head. Next, clay was used to sculpt the Orc facial features and ears. The chin and neck of the lifecast was left uncovered by clay.
An Ultracal #30 mold was made and latex rubber was slush cast into the mold. Slush casting is: a skin of latex that is formed in the mold. It takes over one hour to form a thick enough skin. If you want it really thick, leave it overnight before pouring out the excess latex. This should form a very thick skin of latex.
This was removed and powdered with baby powder. The edges were trimmed with scissors; eyes, nostrils, ear holes and ear vents were created. A large wedge of latex was cut away to make a vent behind the ears. The latex only extended a few inches beyond the ears in the back of the head. A one inch wide strip of black elastic was sewn to strap the mask to the head. A small amount of liquid latex was applied to the thread, on the back side, to seal the knots into the latex half –mask. Do this before painting the mask. This method allows the entire back of the head and hair to be exposed, creating maximum ventilation.
Fake hair was glued onto the mask in the back. It blends into Nina’s own real hair which is very long, dark, and wavy. This is very important because this costume is extremely hot and can be quite uncomfortable to wear for any length of time. Heat naturally collects in the top of the head, if the head is completely covered.
 |
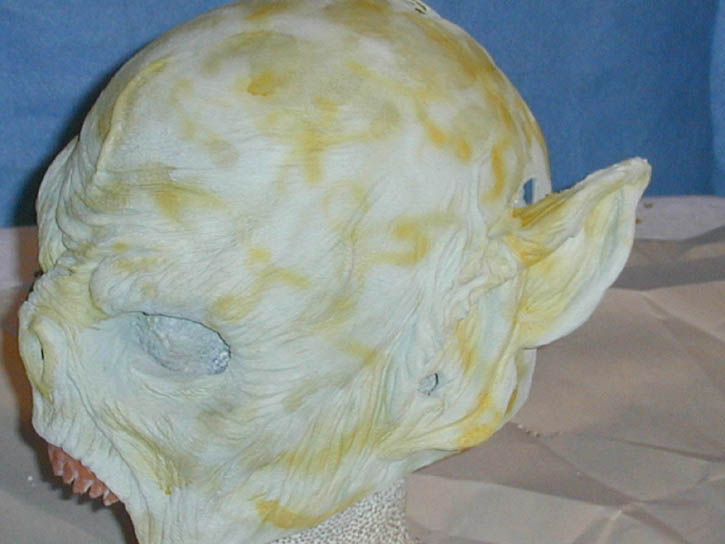 |
| Mask with base coat applied | Mottling layers on the mask |
 |
 |
| Darkening around the eyes | Darkening the tips of the ears |
An area was prepared near a table: the table and surfaces were covered with newspaper and large sheets of plastic were hung around the table area to protect the other objects in the room from overspray. The mask was washed thoroughly with a toothbrush and a solution of citric acid and water. The citric acid can be found at the supermarket, we used Ever- Fresh Fruit Protector brand which stops browning. The citric acid helped to remove the white plaster residue that was left on the mask when it came out of the mold.
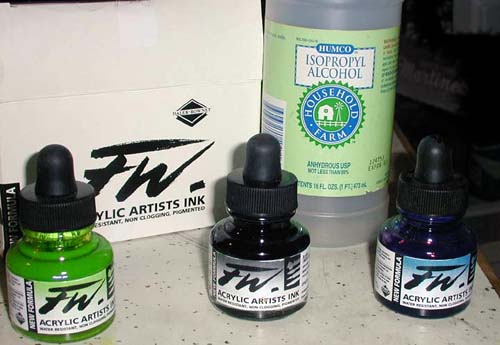
The mask was placed on a Styrofoam wig head. For the base color, we used FW brand acrylic artists ink (Ed ordered by phone, 800-426-6740, and their website is www.danielsmith.com) . This is a special type of extremely thin pigment that can be mixed with alcohol and sprayed through an airbrush. A small amount goes a very long way. The ratio of pigment to alcohol is about one drop of color to ten drops of alcohol.
Ed used white and gray with a tiny bit of avocado green for the base color. Ed mottled in orange and yellow loosely over the entire head. Next, Ed took a very light raw umber, or you could use a transparent sepia tone, and began mottling over the orange and yellow in a tighter pattern, concentrating on picking out the details of the sculpture. This helped to shape it and added character. He continued with another layer of even tighter mottling with a darker, more medium tone of raw umber. He added a little bit of black to that, mottling tighter still and picked out the details of the sculpt. Finally, he began to add spots of various sizes all over.
Next, he sealed it with a light misting of Krylon Crystal Clear. He added a little more black to his raw umber mix and darkened the tips of the ears and lips. He concentrated on the hollows of the eyes, etc.
The upper lip was sculpted in a permanent expression which shows the upper teeth.
Ed first airbrushed in a pale pink for the gums. He slightly oversprayed on the teeth when doing this step, but that’s OK. An alcohol soaked Q-tip will remove the paint from the latex teeth to fix mistakes like that.
Next, Ed mixed a yellowish white color and painted the teeth with a brush to base them out. When this was completely dry, Ed used several washes of FW’s sepia transparent color to get into the cracks and crevices. This gives the teeth a nice, rotted, tobacco-stained look. Ed also went in on the gums with some reddish purple veining using a tiny brush.
Afterwards, Ed sprayed the teeth with a coat of Krylon brand Crystal Clear spray to seal and protect the paint. Last, Ed mixed up a small amount of Devcon brand 5 minute clear epoxy, the kind that comes in a hypo applicator that you can buy at the hardware store. He quickly applied the clear epoxy with a disposable brush to the teeth and gums in a thin coat, just enough to make them look wet. When using this, you must work quickly because it sets up in 3-5 minutes.
Nina put the mask on to determine how much of the neck, chin, and jaw skin needed to be made-up or covered. We applied baby powder to a powder puff and patted it onto the exposed skin at the edges of the latex piece.
When the mask is taken off or lifted up, the powder line ends where the skin is covered showing clearly where the edge of the mask is going to rest. It is necessary to cover up to and up under this line, under the latex piece, so that in the event that the latex half mask shifts at all, while being worn the unpainted skin at the edge will not peek out and ruin the illusion you are trying to create.
We determined that the elastic in the back of the head would allow us to not need prosthetic adhesive. This was the whole point of using this type of half-mask design. It would allow for quick removal and maximum comfort. Also repeat usage if properly taken care of.
We used a special leatherette covered hat box to protect this piece when we traveled.
One final step was to place two metal rings for decoration into the latex. A hole was punched using a leather hole punch tool in the tip of one of the ears. A metal ring was set into this hole and squeezed closed with pliers. A smaller metal ring found on an existing item was cut and placed in the nostrils. A small amount of resin putty was used to secure it but Nina complained and had to break it away when it scratched her skin. She used a sliver of sponge and some liquid latex to fix it.
 |
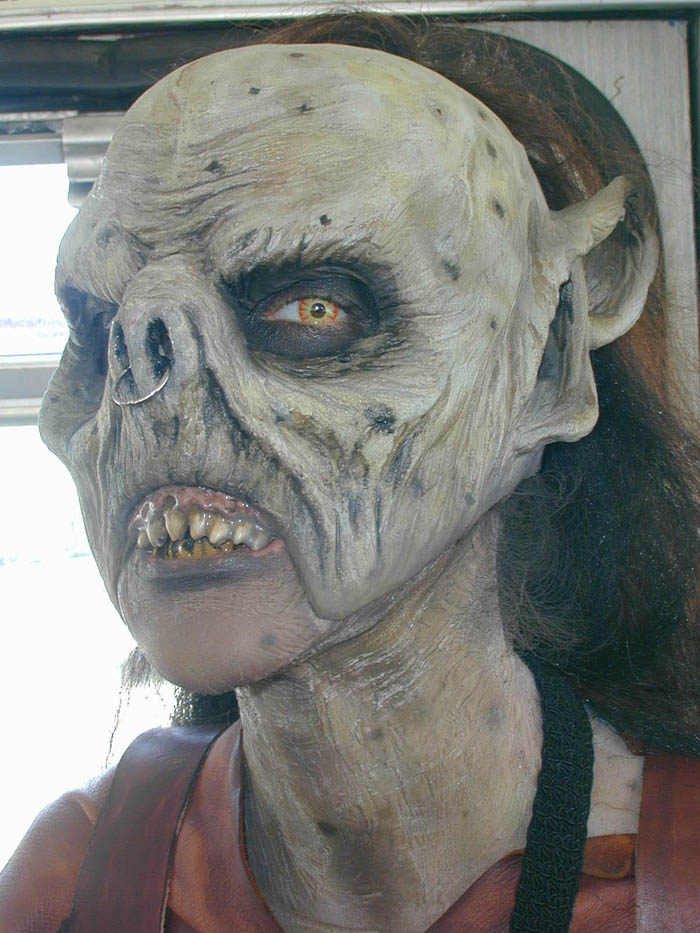 |
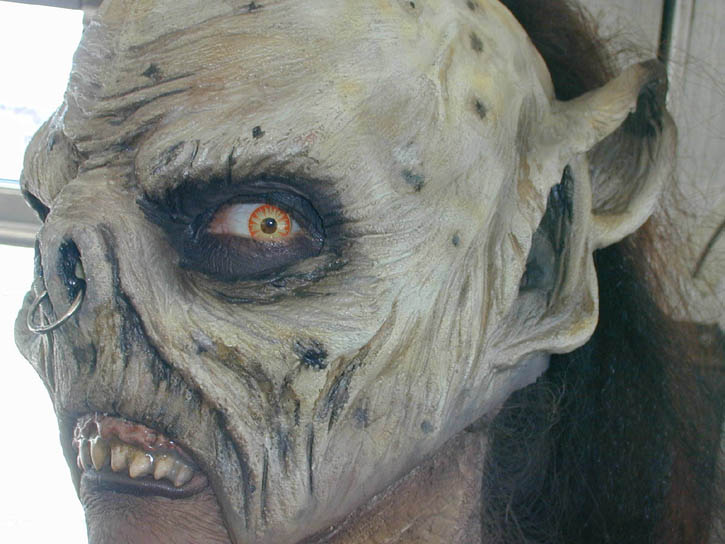
| Sunday at Comic-con – make-up application includes wrinkle effect | Another good photo of the finished make-up |
To create wrinkles and textures on the neck, prior to coloring, we applied old age stipple directly to the skin in sections, pulling the skin taut as we worked. We applied it all around the neck and back of the neck. (Ed found out later that it was not necessary to completely work all the way around the back this way. Her hair completely covered the back of her neck) We used a blow dryer, without heat, to speed up the process.
Another method is using a product called Old Skin Plast, O.S.P (purchased at a theatrical makeup suppl y store). The technique is exactly the same using either material.
After this step, we painted her eye area using the airbrush. She applied the contact lenses first, closed her eyes, and Ed sprayed a black bandit style pattern onto her skin using Michael Davy airbrush prosthetic cosmetic (call 888-225-7026 or visit www.bitstorm.net/mdftv/). He covered an area beyond where the edges of the mask would be so that if it shifted, no flesh tone would peak out. Then Nina put the mask on for the final makeup application. Then Ed airbrushed a base color of pale greyish green, lifting the edges a little to get some color under them. We used paper towels and tissue to cover up some of the mask and bodysuit so that the overspray wouldn’t color them, especially the clear coated teeth under the upper lip. The remaining paint job included layers of sepia transparent tones, airbrushed onto the skin in a mottling pattern, creating highlights, shadows, and spots of different sizes.
Nina’s lower teeth were stained using Krylon teeth enamel, which was purchased at a theatrical makeup store. Two colors were used: “Zahnblack” a tobacco color, and Black. First Nina dried her teeth and held her lip away from them Ed applied the colors and used the black to make her teeth look jagged and broken by painting the tip of a tooth completely black with an angled line creating a jagged tooth he did this here and there to a few of the teeth.
This is a final touch that some might consider optional but you would be surprised how even such a small detail as this can improve the overall look of the finished costume.
We purchased a package of long straight black hair from the local beauty supply store. It is the type used to weave hair extensions in the beauty parlor. This package was cheap; only a few dollars. After opening the package, we cut a small amount free of the bundle and glued it directly to the finished mask in back behind the ears using Weldwood DAP brand contact cement. A small amount was painted on with a brush directly to the latex and a small amount is applied to the ends of the hair. After both have dried, they are pressed together. Dry contact cement bonds to dry contact cement. A damp paper towel can be lightly pressed to the edge of the hair to increase the bond. Small patches of hair were glued on in this manner, working from the bottom up toward the crown of the head in successive overlapping layers. This method creates a natural looking effect.
When putting on the complete costume, Nina prepared her hair in ponytail on top of her head. She kept it in a bun or braid while working on getting into costume and only fluffed out her hair when actually finished. It is the final step before walking out the door. We applied some baby oil to it to calm it down and make it seem greasy & dirty while some was allowed to look fluffy and ratty. Ed separated some strands to hang over the face a little, like the movie Orcs. If we have a chance in a future wearing, Nina wants to put some crushed leaves in her hair as the Orcs had (you can see it in some close-ups).
 |
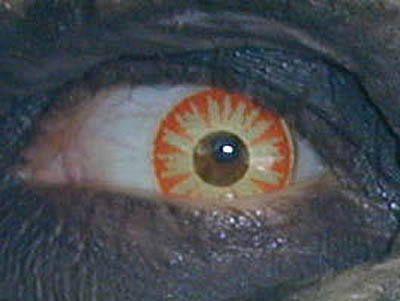 |
| A lock or two of hair hangs down on the face, as in the film | These lenses matched Nina’s prescription so she could see clearly |
Nina believed in total commitment to the look of the Orc. We didn’t want any fleshtone showing or skin or even eyes! Nina went to Lens Crafters and was fitted for a pair of contact lenses that fit her prescription. They had a catalog of wild and bizarre lenses. None of them quite matched what we saw on the DVD and photographs, but we settled on a pair with red outer rims and a yellow center. Just trying on the mask and contact lenses was enough to scare the cat, so we decided we were on the right track.
 |
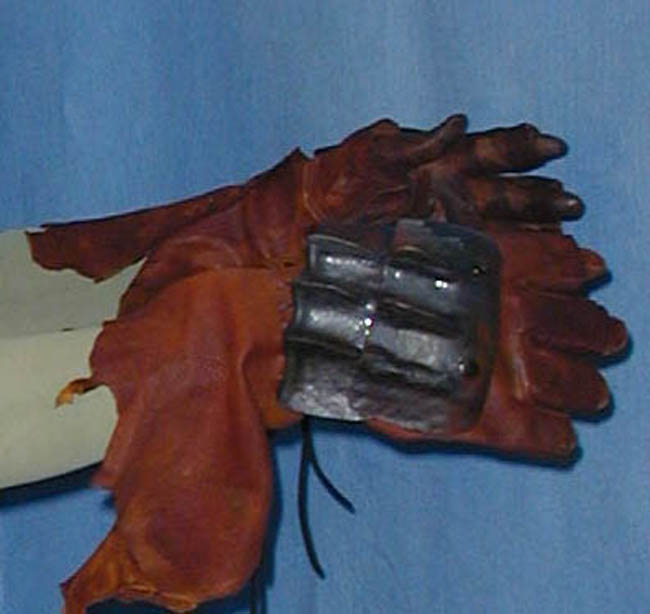 |
| Glove and gauntlet details | Trying on the gloves at home |
Ed used two pairs of leather gloves to start, one tight fitting pair and one loose pair. Both were dyed brown to match everything else. He cut the tips off the larger pair’s fingers and cut out a half moon shape from the palm. Then he cut out squares from the inside of the fingers. Two pieces of armor were attached to the back of each large glove. Nina lashed some leather scraps to the bottom edge of the larger gloves to form a base for the gauntlet. When finished, the tight gloves are worn inside the larger ones. Over this went two pieces of armor, one on each forearm ending at the wrist and extending beyond the elbow into spiky ends that must be held against the body when walking through crowds. The forearm armor was held on by leather laces.
 |
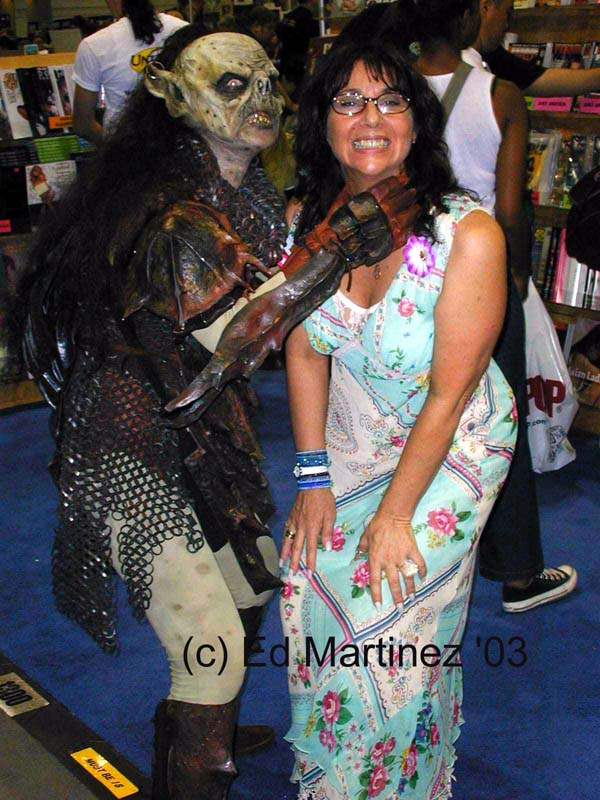 |
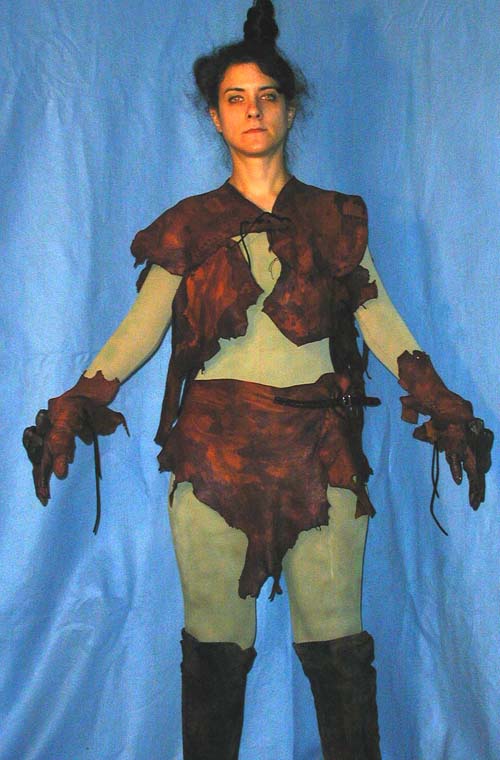
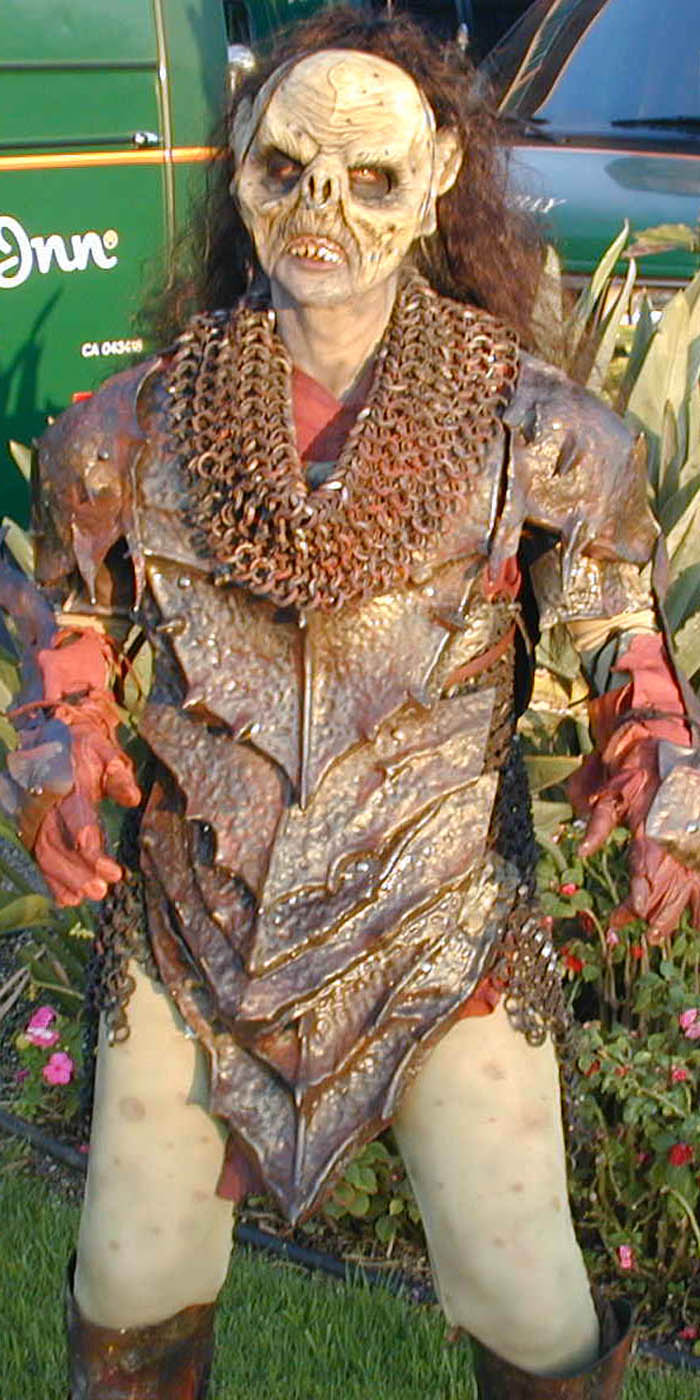
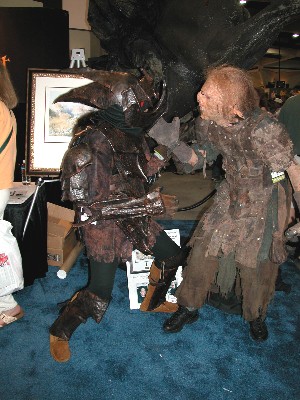 |
| The finished costume | Menacing friend and foe alike at San Diego Comic Con 2003 | Ed and the Sideshow Orc from Comic Con 2002 |
We are not interested in weaving chain mail or making costumes for other fans, but often if you’re in costuming you do get individual requests. The fun part of this obsession/hobby/craft is to do it with your own hands. Nothing else feels as satisfying. Getting compliments is very rewarding after months of hard work. We admire all the hard work done by our fellow costumers and the professionals who inspire us.
If you have more questions, feel free to ask the Yahoo list or talk to the authors directly at edwardamartinez@sbcglobal.net
This page was last updated 04/22/08